Integrating Airflow with Slack for Daily Reportings

Photo by Austin Distel on Unsplash
Tech Stack: Python 3.7, Airflow (1.10.10), Docker
GitHub link: All of the code can be found here.
Airflow + Slack
Slack is an increasingly popular chat app used in the workplace. Apache Airflow is an open source platform for orchestrating workflows. One of the biggest advantages to using Airflow is the versatility around its hooks and operators. Hooks are interfaces to external platforms, databases and also serve as the basic building blocks of Operators.
The Slack Webhook Operator can be used to integrate Airflow with Slack. This operator is typically used for reporting and alerting purposes by scheduling incoming messages to Slack channels when some trigger condition is met.
I’m going to show you how to leverage these tools to perform some very simple reporting in your Slack workspace: send daily weather forecasts to a channel.
These foundations can be expanded to create more complex Airflow + Slack integrations. Let’s get started!
Setting up a Slack Workspace
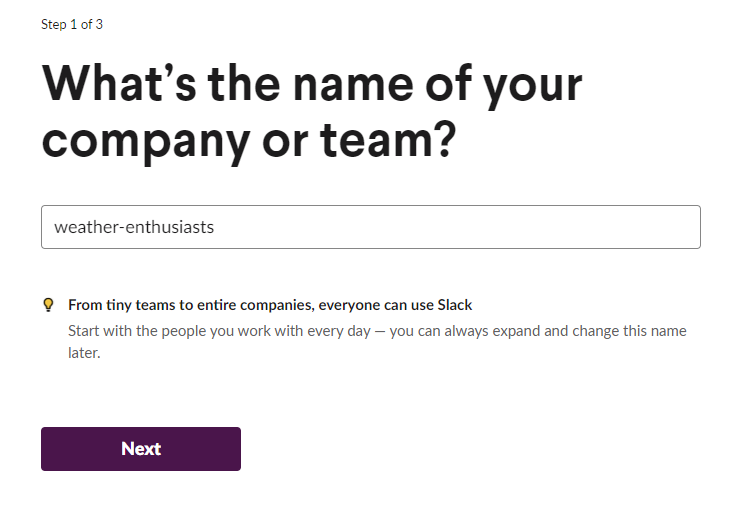
A workspace is a shared hub of channels where teammates and collaborators can communicate together. I created a workspace called weather-enthusiasts.
From our workspace, we need:
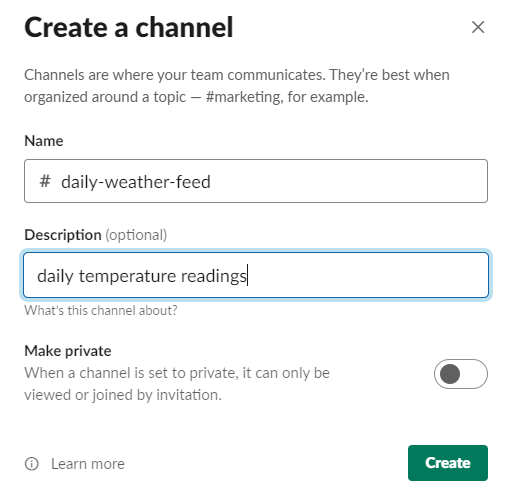
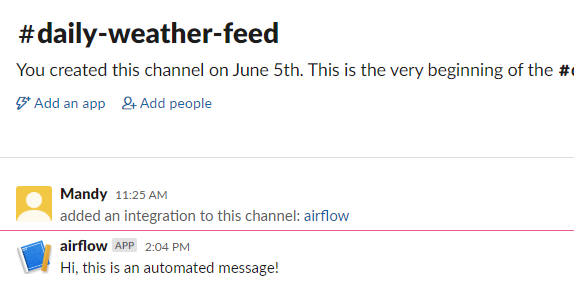
Let’s have Airflow post to a public channel called #daily-weather-feed. If the message contents are sensitive, consider changing this to a private channel.
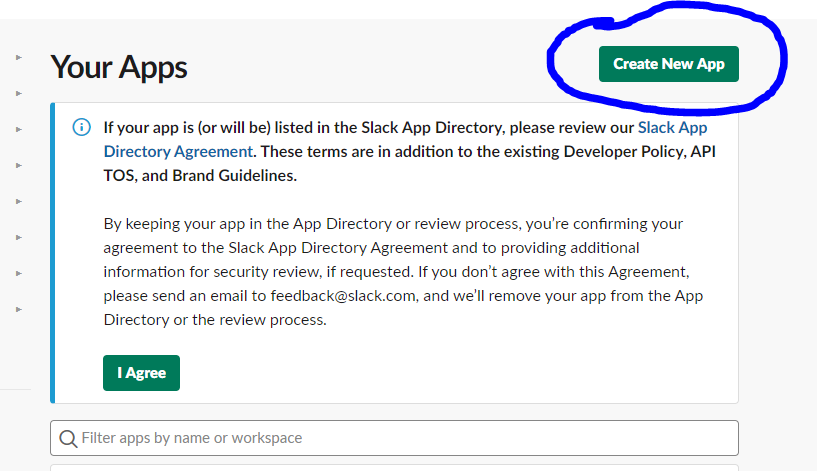
Next, we want to create an Airflow app for the workspace. Go to Slack apps and click "Create New App"
This should lead you to a modal where you can set the App name. Airflow will post messages under the name you select. For simplicity, I named my app "airflow".
Exiting the modal leads to a page where you can add “Incoming Webhooks” as an app feature.
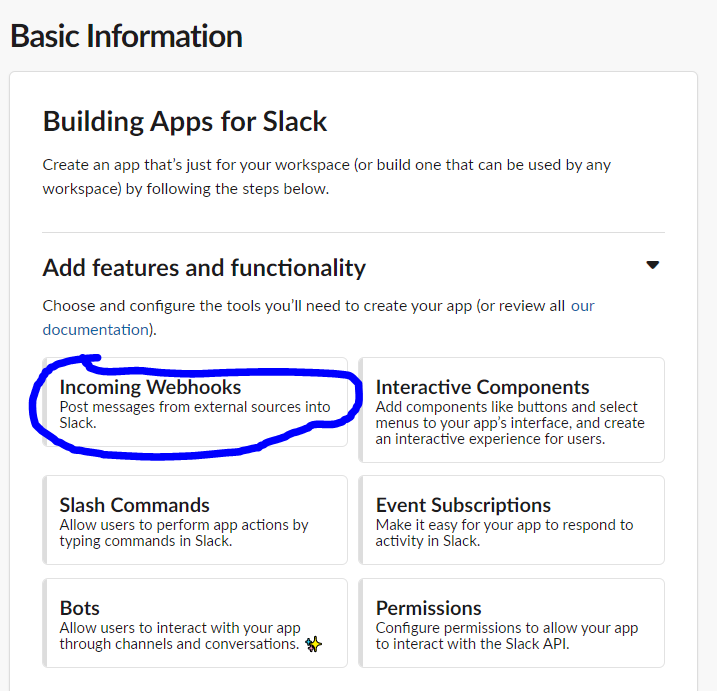
Make sure that incoming webhooks are turned on.

Scroll to the bottom of the page and click on “Add New Webhook to Workspace”.
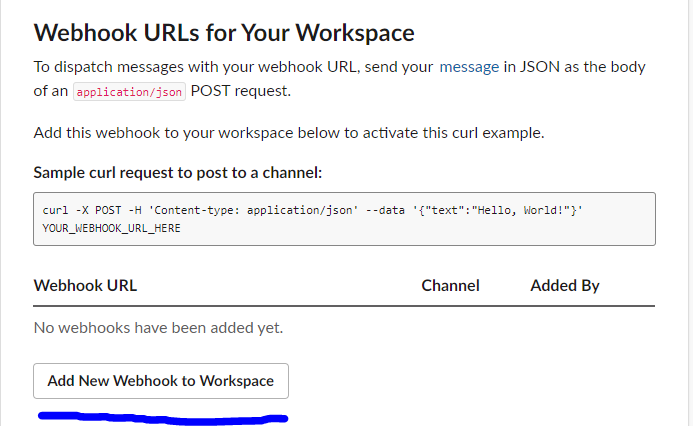
This generates a WebHook URL, which can be used as authentication for Airflow. The WebHook URL also allows you to programmatically send messages to Slack. Here’s a very simple POST request you can try in the terminal. Don’t forget to replace my redacted URL with yours.
Check your channel to see the automated message.
If you are interested in learning more about using APIs and Python in the context of software engineering, this is a Coursera specialization well suited for beginners.
Airflow + Docker
I’m going to show you how to set up Airflow with Docker to properly containerize your application. I am using part of the setup from puckel/docker-airflow.
Airflow comes with a lot of configurations which can be complex to set up. Using Docker makes it easier to get started with reproducible results.
What is Docker?
Docker is a way of packaging individual applications independent of your local set up. Each application is in its own Docker container. Here are some helpful resources about Docker, including one that I have written about Docker commands.
Airflow
The entire Airflow platform can be broken into four parts: the scheduler, the executor, the metadata database and the webserver.
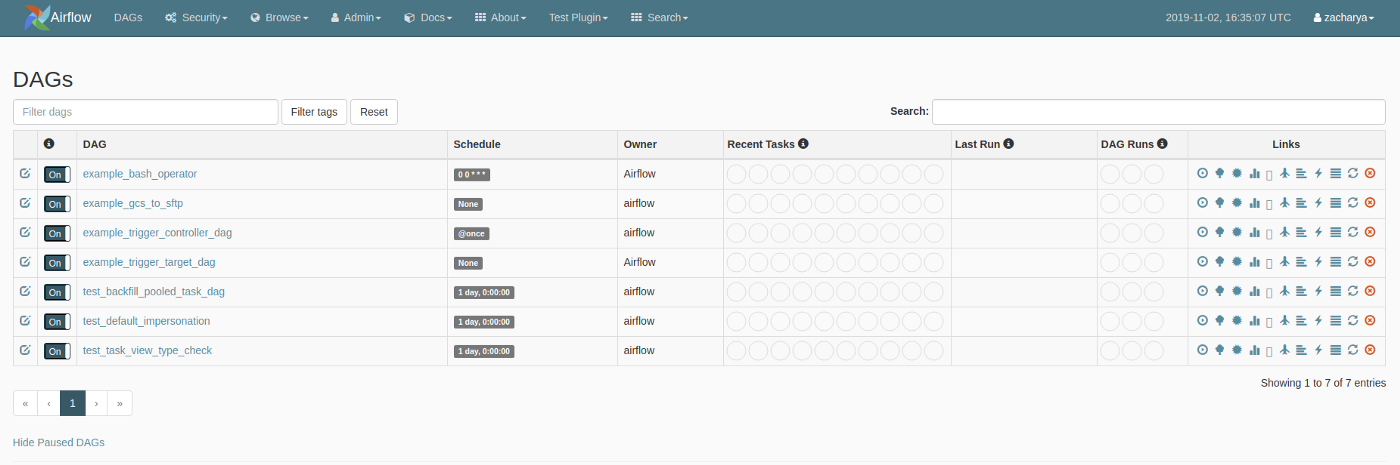
This is what the webserver looks like:
DAG (Directed Acyclic Graph)
DAGs are a very important concept in Airflow. Each DAG is a collection of similar tasks organized in a way that reflects their dependencies and relationships. These graphs cannot have directed cycles, or in other words, mutually dependent jobs.
DAGs are defined in Python scripts and they help the scheduler determine which jobs to run. A downstream job cannot run until all upstream jobs have finished successfully.
Here is an example DAG. Arrows represent dependency relationships; run_after_loop only runs if runme_0, runme_1, runme_2 finishes successfully
Setting up Airflow
Create a repository for your Airflow server. I will name mine slack-airflow. Once again, the repository is hosted here. These are the components in the directory:
requirements.txt
This is for installing the required Airflow libraries (plus any other required libraries).
apache-airflow[crypto,celery,postgres,jdbc,ssh,statsd,slack]==1.10.10airflow/config/airflow.cfg
The Airflow configuration file is typically downloaded as a part of the Airflow installation (added bonus of using Docker: you don’t need to go through the installation process). The default configurations are fine on their own, but settings can be tweaked for your particular use case.
Here is a comprehensive listfrom the official documentation indicating what every field corresponds to.
This is the only file you need in the airflow directory.
Dockerfile
This contains the instructions for your Docker image. We specify some environment variables, more dependencies and instructions for running pip install and define the image entrypoint with our entrypoint.sh shell script. The last line also launches the webserver.
I am also using Dockerfile to store secrets to Slack and to the Open Weather API. Ideally, secrets should be stored in their own environment file and baked into the Docker container at build time. The environment file should be added to .gitignore so that it will not be surfaced in the codebase.
At the risk of over complicating this set up, we’ll leave the secrets in the Dockerfile.
Please fill these two lines accordingly with your secrets. Keep in mind when sharing your code that these are sensitive credentials! The weather_api_key is used to get daily weather forecasts — the next section covers how we can obtain this token. For now, feel free to leave it empty.
ENV weather_api_key=
ENV slack_webhook_url=
docker-compose.yml
docker-compose is an organized way of handling Docker settings. It’s especially helpful if you are working with multiple containers that are dependent on each other.
The first service postgres creates the Postgres database responsible for storing the Airflow states. The credentials are set in the Dockerfile, which can be used to connect to the database on your local network.
This is the full database URL. The credential components are scattered across the Dockerfile and start up script. You can use this URL to connect to and query the Airflow database from your local network.
postgresql+psycopg2://airflow:airflow@postgres:5432/airflowThe second defines the webserver, which will be hosted on port 8080 in your local network.
Open Weather API
We can utilize the Open Weather API to get daily forecasts. Create an account and generate an API token for your account.
Go back to the Dockerfile and set this environment variable with your token:
ENV weather_api_key=Weather DAG
Create the DAG file in the dags folder.
Step 1: Load the Dependencies
import os
import requests

from airflow import DAG
from airflow.contrib.operators.slack_webhook_operator import SlackWebhookOperator

from datetime import datetime
Step 2: specify default arguments
I added myself as the owner of this DAG. This is a required argument for every DAG. If depends_on_past is set to True, subsequent tasks will not run unless the previous run was successful. Pick a start_date from the past. Retries being set to 0 means that Airflow will not try to rerun failed tasks.
default_args = {
   'owner': 'Mandy',
   'depends_on_past': False,
   'start_date': datetime(2020, 6, 6),
   'retries': 0,
}
Step 3: simple class to get the daily forecast
We send a GET request to Open Weather to get the weather details for Toronto. The payload is parsed and the description field is used to describe the forecast.
The API key is fetched from the environment variable instantiated in the Dockerfile.
def get_daily_forecast() -> str:
    api_key = os.environ['weather_api_key']
    r = requests.get('http://api.openweathermap.org/data/2.5/weather?q=Toronto&APPID={}'.format(api_key))
    forecast = r.json()['weather'][0]['description']
    return 'The forecast today is: {}'.format(forecast)
Step 4: DAG Definition
We are using the SlackWebhookOperator in our DAG. Feel free to name the http_conn_id anything you want, but the same connection needs to be set on the Airflow server. The webhook token is fetched from the environment variables.
The default arguments are referenced here in addition to the scheduled interval and catchup=False (this prevents Airflow from running backfills).
The schedule_interval is a cron syntax that determines the cadence to run your DAG. The arguments correspond to (in order): minute, hour, day, month and day of the week.
with DAG(
  'DailyWeatherReports',
  default_args=default_args,
  schedule_interval='12 * * * *',
  catchup=False,
) as dag:
    post_daily_forecast = SlackWebhookOperator(
    task_id='post_daily_forecast',
    http_conn_id='slack_connection',
    webhook_token=os.environ['slack_webhook_url'],
    message=get_daily_forecast(),
    channel='#daily-weather-feed'
)
Starting the Docker Container
Run these two commands in your root directory. This builds the image and tags it as airflow . It’s important that you don’t change the tag name as it is referenced in the start up script.
docker build . -t airflowThis spins up the relevant Docker containers based on the instructions in docker-compose.
docker-compose -f docker-compose.yml up -dThe first time running these steps will take a few minutes. After it is done, the web server will be exposed to your local 8080 port.
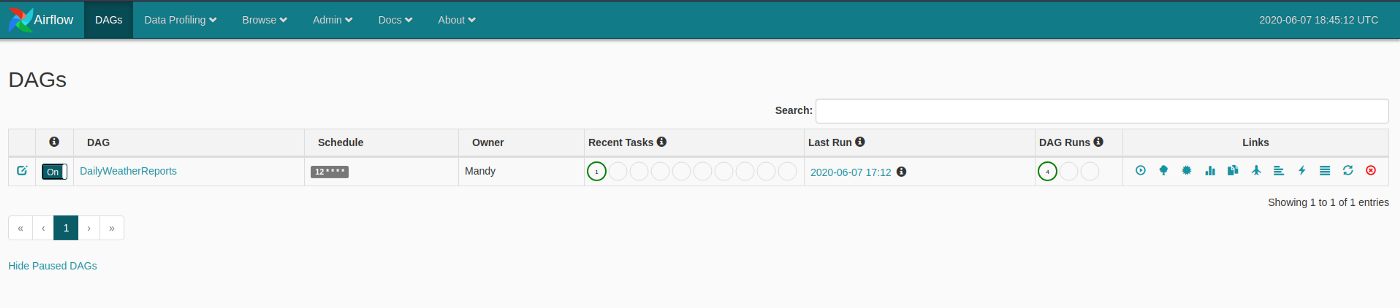
You can access it from your local network at localhost:8080.
Setting up your Slack connection on Airflow
The last thing we need to do is set up slack_connection in Airflow (this name needs to match the http_conn_id specified in the DAG file).
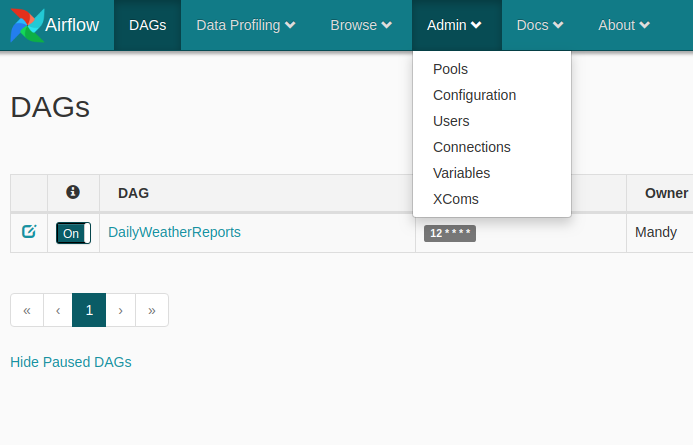
Step 1: Go to Admin and then Connections
Go to localhost:8080 to access the webserver and click on Admin > Connections.
Step 2: Create a new Connection
Hit "Create" and fill the fields accordingly. For the Slack connection, you will only need the "Conn id" and "Host"
Test the DAG
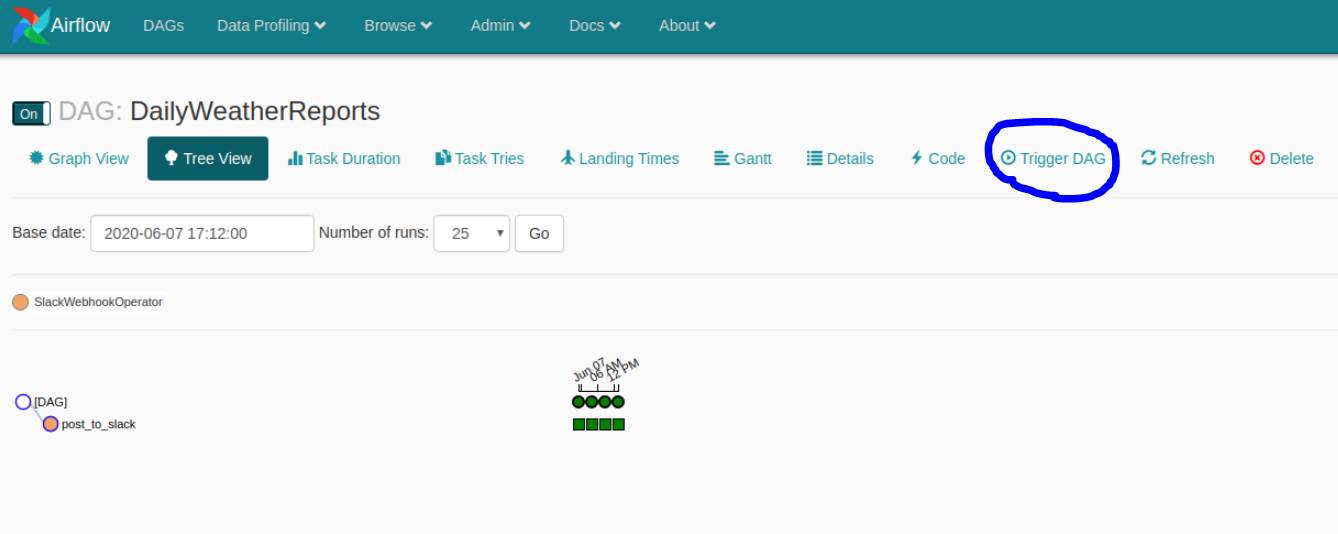
If you don’t want to wait for the scheduled interval to observe the results, manually trigger a DAG run by hitting the "Trigger DAG" button.
After the task runs successfully, this message appears in Slack. Today’s forecast is clear sk(ies), which sounds about right ☀️

Awesome! Say goodbye to weather networks and hello to programmatic forecasts 😃
To get the weather forecast every single day, leave the Airflow server running.